
This educational tutorial is designed to help users better understand the M2 cinema lens adapter so users can optimize their shooting experience. Please note the still images provided here are not from actual video footage. They are representations designed to illustrate the point.
The optimal look we are all looking for is a "shallow depth of field" effect, which is a combination of sharp in-focus subject and a soft, out-of-focus background:

This look is also known as "shallow depth of field". It is highly desirable since modern filmmaking makes extensive use of selective focus to help tell the story. The lack of selective focus is often a giveaway to something shot on video. This selective focus allows the filmmaker to guide the viewer to pay attention to what is important, and by shifting what is in focus can then guide the viewer towards what to look at next. This "racking of focus" is a great example:


An important point here is that what is in focus is what the filmmaker wants you to look at - we'll come back to this point in a bit.
Since a video camera is largely incapable of creating this shallow depth of field (DOF) effect (for reasons we won't get into, but we assume we are all in agreement on this point), 35mm lens adapters were invented to help achieve this effect with video cameras.
The basic principal is similar to watching a movie in a movie theater, where you have:
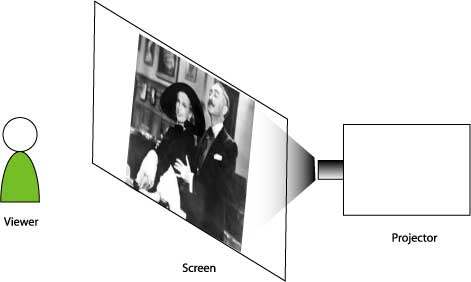
The only inaccuracy in this picture is that the projector really projects onto the screen rather than through the screen as pictured above, but let's assume this is how it works for now.
The 35mm lens adapter works on the same principal, except think of it this way:
However, instead of the viewer just "watching the movie" your camera instead captures the movie through its CCDs and eventually to its tape.

All 35mm lens adapters work according to this principal
Since the projector (the 35mm lens) and the viewer (your camera) don't change, all of the attention for linking the two together to create the shallow depth of field boil down to how the screen works (the image element).
However, if the image element is exactly like a movie screen in a theater, it would be solid. However, if the projector is projecting from behind the screen (as shown above) that would be a problem since it would not allow the image to be seen by the viewer on the other side.
Why not make dispense with the image element completely, or make the image element completely transparent? Wouldn't that create the sharpest image? Unfortunately this does not work. You can see the 35mm lens' image and the image is very sharp, but there is no depth of field captured. Instead everything is in focus, and any change of focus on the 35mm lens doesn't have an effect on the image. The optics behind this are a bit complicated, but a completely transparent image element does not completely capture the image's depth of field and "out of focus" properties. If you are really interested in testing this, you can remove your image element from your M2 adapter and try it out.
Image elements are therefore semi-transparent through the use of grain - tiny solid specs on the image element that capture the image. They are small enough that when you look at the screen from farther away, you don't really notice the specs but see the image. This is the same idea as a pointillist Seurat painting, where viewed close up the painting is just points, but far enough away, you don't see the points but rather the painting
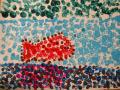
close up, you see the image as points
:
Farther away, you see the picture, though it is still made up of points
Grain allows you to capture the complete shallow depth of field, but it also comes at a price. More grain creates more diffusion in the image, which results in less contrast, color, and sharpness.
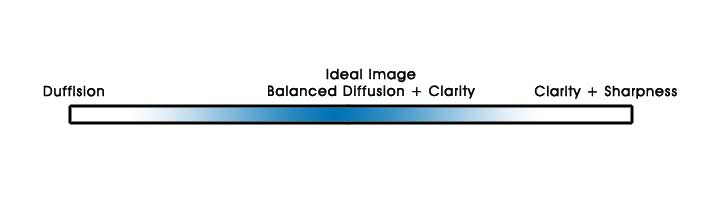
Okay - so here's the point of all this. The ideal image represents a balance between diffusion and sharpness.
Think of it as the middle ground in a spectrum of diffusion and sharpness:
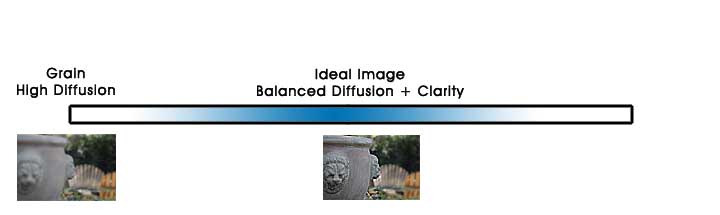
Traditional approaches have started with an image element that has a high diffusion - that is, it contains a lot of grain in the image element, which captures the image projected by the 35mm lens well. However, the more grain in an image element, the higher the diffusion, which reduces light, clarity, and image sharpness.
Think of it as a spectrum of diffusion from blurry to sharp:
The micro35 DIY image element uses this approach, as do some other 35mm adapters (home built and otherwise). However, there are some fundamental challenges to this approach that cannot be overcome:
While these are certainly drawbacks to be considered, the images created in this regard are still quite good and very functional. In short, the adapter is a tradeoff of the fuzziness wanted for shallow depth of field with the sharpness, contrast, and color still desired in the 'in focus' subject.
However - and this is the important part - users of traditional grainy adapters understand these drawbacks and adapt their shooting style and shooting conditions to compensate for these drawbacks.
Is it neither good nor bad - it is simply taking into consideration all factors (including the performance of the adapter, your camera, etc.) in designing your shots. For example, due to loss of light within these types of adapters, shooters typically carry additional lighting equipment, don't shoot in dim light, etc.
One of the greatest drawbacks to this approach is that color, contrast, and sharpness are compromised to some degree.
The M2 represents a significant departure in 35mm lens adapters. The underlying principal starts with a different premise - that within shallow depth of field images, the priority for image quality should be placed on the 'in focus' subject while blurring out the background. The M2 starts on the opposite end of the spectrum in creating the ideal film look by using very little grain:

We believe the M2 represents the optimal approach to achieving ideal image for creating a shallow depth of field while also overcoming the drawbacks of traditional image elements:
Also, under most shooting conditions you will find the shallow depth of field and image quality to be exceptional, as in the following example stills:

If you followed the previous discussion regarding the ideal image being a balance between diffusion and clarity, you will probably ask what the tradeoffs are to this approach. This is important to understand - as you would understand the tradeoffs of the traditional grainy approach - so you can adjust your shooting style and conditions to maximize your image quality.
As mentioned before, in most shooting situations we've seen the M2 represents the best possible image for a 35mm adapter. In some situations involving certain types of lenses combined with lighting conditions where the background has high lighting and contrast, and the background is desired to be extremely out of focus, a "ghosting effect" may occur. This looks something like the background image being both blurry and in focus:


This effect is the result of too much light in the background forcing its way through the image element. In effect, you see both the out-of-focus image from the image element, and the image itself. While this is generally not a good thing, if it occurs it may not be noticeable to a watcher since the effect can be minimal, and because the focus and attention is placed on the 'in focus' subject. Most importantly, if you understand this, you can also control it by adapting your shooting style and shooting conditions.
If you understand these design principals of the M2, you can recognize the shooting situations and conditions where you may need to compensate your style or conditions to achieve optimal results:

This approach to managing light is very typical of the "film style shooting" where the incoming light is managed prior to hitting the lens. In this regard, shooting with the M2 is even more "film style".
We firmly believe the M2 represents the best approach to achieving the ideal 35mm image with your digital video camera. That being said, for some users the traditional approach to the image element (that is, the grain version) may be much more comfortable and familiar. In this case, owners of the M2 can take advantage of the open, modular design of the M2 adapter, and purchase the DIY image element (which uses a traditional grain approach) and swap out the M2 adapter.
This benefit of the adapter allows users to start with an element with which they may be familiar, and at a later time upgrade to the M2 by simply replacing the image element.